By: Kim Waybright

Thursday, November 8, 2012

Bingo Hall to Wedding Reception Hall


I was honored to be asked to help decorate a fire hall/bingo hall for a wedding reception for some friends of ours.  They were having their reception in the same fire hall I had used for our wedding.  His mom called me in a tizzy!  So I got started.

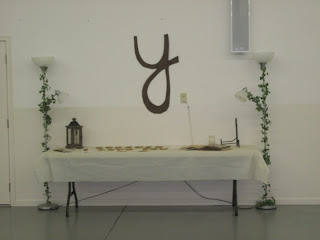
We needed soft lighting and some items to soften up the room a bit.  She went and bought some live trees and got them 75% off because it was the end of the season:  score!  She also bought the cheapest floor lamps she could find (order through Walmart on Ebates and get cash back) and we dressed them up a bit by wrapping them in some fake ivy (leftover from my reception).  Lovely!  

With the help of the groom's sister's boyfriend, we hung icicle lights from every row of fluorescent lights!  Very tedious but DEFINITELY worth it!  And then we hung the humongous parachute in the middle of the room, which not only looked awesome... it actually helped with sound!  

I didn't take the best pictures of all the work that was put into this project but there were lots of amazing volunteers willing to help!  :-D  

We were trying not to use the fluorescent lights, so I came up with lighted pictures from the actual ceremony (they got married and had a reception in Missouri, where she is from, and then had another reception for everyone who couldn't make it in Pennsylvania).  I discovered (on Pinterest) that you can get cheap prints from Staples called Engineer Prints (ordered them from Staples on Ebates and got 6.5% cash back).  I had them print five 2'x3' pictures and one 3'x4' picture.  

We hung the largest one behind the food table...

 And the other ones were placed around the room.

  I used really cheap foam board from the dollar store so the light actually glowed through the pictures!  I really like how they came out... unfortunately, I didn't take very good pictures of this project!  

You can see how the pictures were glowing a little in this one...

Stuff from the Wedding (invitations, programs, etc)

The Bride & Groom's Table...

To create the glowing pictures, I used spray adhesive and mounted them on foam board (from the Dollar Store).  I created the light feature by taping Christmas lights to another foam board underneath and created a gap between the foam boards by putting cardboard tubes in each corner. Super simple, and they turned out GREAT!!

My house was temporarily out of order for normal living during this project... My super husband has gotten quite used to (and rather good at) weaving through my craft mazes! ;-D

It turned out to be a beautiful reception and we are so happy for the newly married couple!  
Congrats to Abby & Jimmy!


Wednesday, November 7, 2012

Invitation Ornaments


I absolutely love the idea of the invitation ornaments.  I found the orginal idea on Pinterest and can be found here.  What a GREAT idea!  So, at the time, I had a few upcoming weddings I would be attending and decided to make an ornament for each of them.

The first wedding was for my husband's cousin.  It was going to be in a large barn and had a country theme with cowboy boots and lots of mason jars.  Ashley had the greatest ideas for her invitations and RSVP cards.  The invitation itself was shaped like a mason jar and the RSVP card was a postcard with mason jars on it. (I was honored to be asked to make the invitations for the bride.)  ;-D

I decided I wanted to tie the mason jar theme into the ornament as well (ordered mason jars from Michael's on Ebates and received 7% cash back).  So this is what I came up with.  I thought it came out really cute!  I decided to go with the vintage/burlap look for the gift wrap because I thought it worked well with their theme... not that it really mattered.  Haha! 


And this is another one I made for some friends of ours...


I also made them etched glasses and an etched Pyrex dish.  Check out that DIY tutorial here. 


Etched Glasses & Pyrex Dish


I decided to try out some of the ideas for etching I have found while floating around in blog land.  I saw the pyrex glass dish here that I really liked so I thought I would give it a try.  I saw the monogrammed glasses here and loved them. 

I started out by cutting all the lettering out with my cricut machine on some leftover contact paper I had from a previous project.  I punched out the letters and used what you normally would throw away.  
After finding the perfect placement on all the glassware, I glopped on some of the fantastic etching cream with a Q-Tip (I bought Armour Etch from Michael's on Ebates with a coupon and got paid an additional 7% cash back).  I let it sit and do it's magic for a few minutes.  Then I just rinsed it off and admired my wonderful work!  :-D  


For a first timer, I think they came out GREAT!  I have sooo many other plans for this amazing product! 


New to Blog Land

Here I am, in the new world of Blog Land!  Please bear with me as I am not the best writer.  I decided to start a blog when I realized I am GREAT at STARTING projects, but not so great at FINISHING them!  I plan on using my blog as a reason to stay focused and to complete my projects!!  I am also in the process of remodeling/redecorating my ENTIRE house!!  :-D  Happy reading!!

Be sure to check out My Etsy Shop!


Get Paid when you SHOP!!

I have earned hundreds by just using this portal to do my everyday shopping! You are going to buy it anyways... why not earn cash while doing it! We use our cash back as vacation spending money!! :D It's TOTALLY FREE!!!